Your supervisor or anyone with approval authority for your time card can add a job to your personal list. If you have access to the company job master, then you have the option to add a job to your personal list yourself either when you look it up from the master, or any time under My Settings.
Note that in previous versions of e-timecard, you added and deleted jobs in your personal list on the same screen that you used to add multiple jobs to your time card. Now, My Settings is where you go when you want to manage your personal list in those ways.
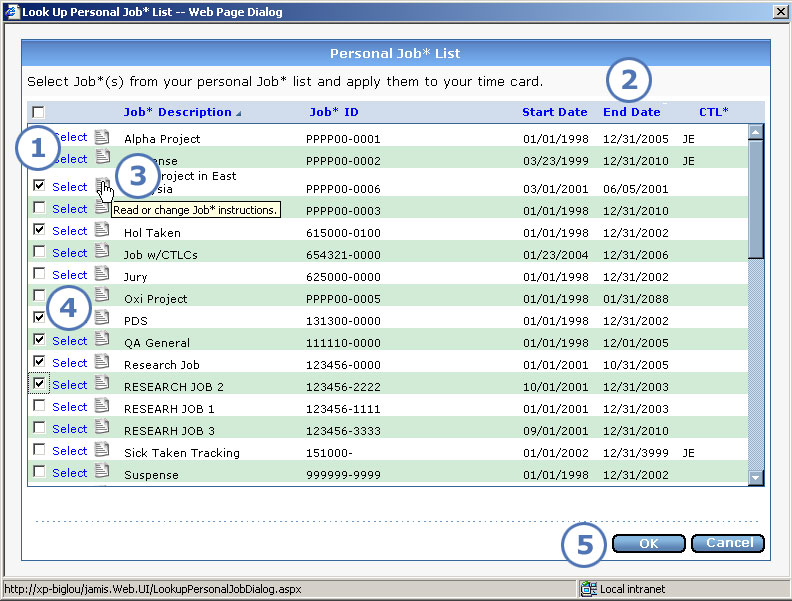
If you need to select multiple jobs from your personal list to add to your time card, select Add Multiple from the Job (user-defined label) dropdown list. The Look Up Personal Job List (user-defined label) screen shown below appears.

|
This item... |
Is for this purpose... |
|
Click on the check box for each job that you want to add to your time card. You can click on the check box above the list to select all jobs in your personal list. |
|
In addition to the job code and description, you can see the job start and end dates. Whether the screen shows the cost element or contract labor category depends on your company's setup. |
|
If you see this icon: If you see this icon: While reviewing the instructions, you can also view more information about the job, including a detailed description and the org9. |
|
To add one job to your time card, click Select to the left of it. The Edit Time Card screen reappears with the job that you selected added to the field. |
|
After you click check boxes for jobs, click OK. Each job that you selected appears on a separate line on the Edit Time Card screen. |