If you are a group expense keeper, then you can mass enter pre-authorization requests and expense reports for other employees. Your administrator determines which departments and employees you can access for mass expense entry.
The first step in mass entering expenses is to select the employee.
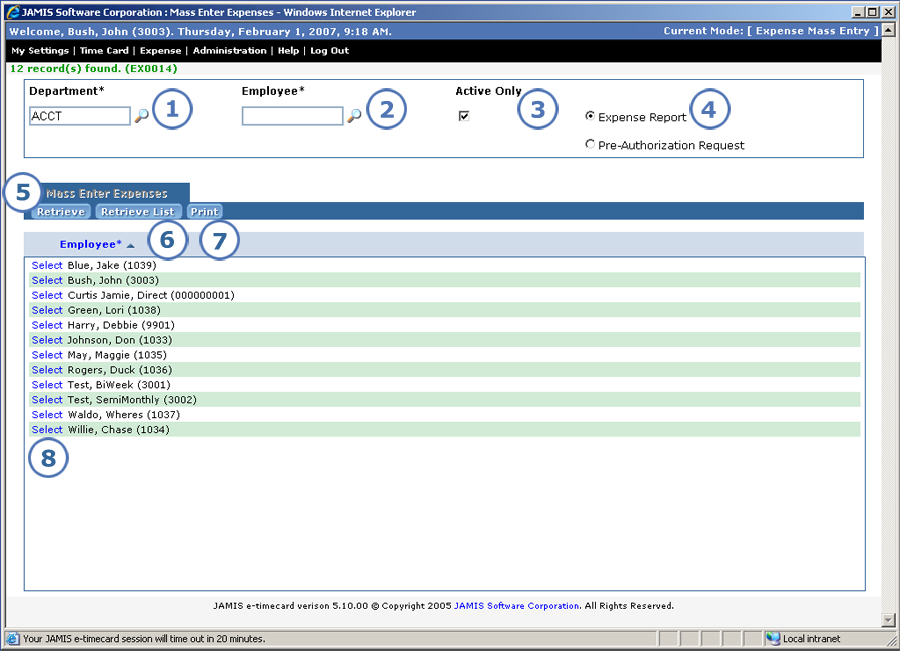
Below is an image of the Mass Enter Expenses screen, which you can access by selecting Mass enter expenses from the Go to dropdown list while you log in, or by clicking Administration > Mass Enter Expenses from the upper-left corner of any application screen.
|
This item... |
Is for this purpose... |
|
You can enter an org9 for the employees whose expenses you want to enter. Click |
|
You can enter the employee whose expenses you want to enter. Click |
|
By default, the Active Only check box is turned on. Turn this check box off if you want to retrieve both active and inactive employees. |
|
To indicate the type of expense form that you want to enter for the employee, click Expense Report or Pre-Authorization Request. By default, Expense Report is selected. This feature lets you select whether you go to a selection screen for requests or reports. In prior versions, request and report selection occurred on one screen, which often led to many forms and approved requests to scroll though. |
|
After you select criteria as described in 1 through 4, click Retrieve if you entered an employee. e-xpense automatically brings you to the Create Pre-Authorization Request or Create Expense Report screen for the employee. Which screen appears depends on your selection in 4. |
|
After you select criteria as described in 1 through 4, click Retrieve List if you entered an org9 and left the employee blank. This lists all employees for the org9 that you entered. See 8 for your next step. |
|
Click to print data for mass entering expenses. Mass Enter Expenses is one of many screens that now let you print data. |
|
Click Select to the left of the employee for whom you want to enter expenses. Either the Create Pre-Authorization Request or Create Expense Report screen appears, depending on your selection in 4. |