Once you open a request or report to review, you can reject it if necessary to return it to the employee for correction.
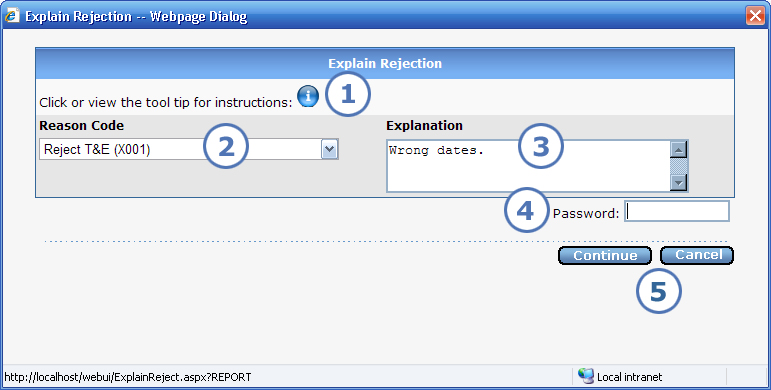
When you click Reject from the request or report, the Explain Rejection screen show below appears.

|
This item... |
Is for this purpose... |
|
To view on-screen instructions for rejecting a request or report, you can either click the |
|
Select the appropriate reason code for rejecting the request or report from the dropdown list. |
|
If "(explain)" appears to the right of the reason code that you selected, then you must type specific details about why you're rejecting the request or report. Otherwise, the explanation is optional. Prior to this version, if your reason code selection required an explanation, you had to click OK on a message screen that informed you of this, then enter the explanation on another screen after that. So, one rejection could result in up to three screens of reason/explanation selection. |
|
Your company's setup determines whether this field appears. If it does, enter the same password that you use to log in. |
|
Click Continue to finish rejecting the request or report. e-xpense presents a message to confirm that you have successfully rejected the request or report. The screen that this occurs on depends on whether you selected one or multiple requests/reports to review on the Approve Pre-Authorization Request or Approve Expense Report screen.
If you decide that you do not want to reject the request or report, click Cancel. Regardless of the information that you entered on the Explain Rejection screen, the rejection will be canceled. |