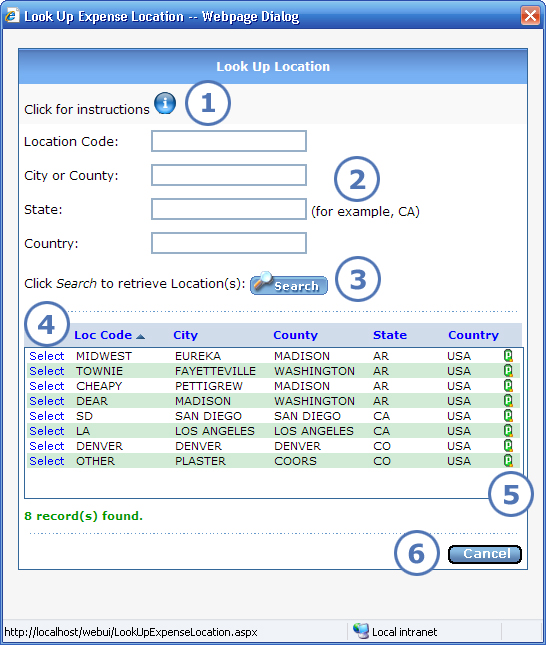
To identify the area from which you want to obtain per diem rates, you can enter a location. When you click ![]() to look up a location code from a pre-authorization request or expense report, the screen shown below appears.
to look up a location code from a pre-authorization request or expense report, the screen shown below appears.
|
This item... |
Is for this purpose... |
|
To view on-screen instructions for looking up a location, you can either click the |
|
Your choices for search criteria are: location code; city or county (enter one or the other, not both); state; country. You can enter partial information in a search field, such as 1 to retrieve all codes that begin with the number 1. You can leave all search fields blank to retrieve all of your company's location codes. |
|
Click Search to retrieve location code records that match the criteria you entered. |
|
When you find the location code that you are looking for, click Select to the left of it. The Edit Pre-Authorization Request or Edit Expense Report screen reappears with the location code that you selected added to the field. |
|
If you wish to review per diem rates for the location code before adding it to the request or report, click The Per Diem Rate screen appears with per diem rate details for the location: season begin and end dates, maximum lodging, maximum M&IE (meals and incidental expenses), breakfast, lunch, dinner, and incidentals. If the location has different per diem rates for different begin/end dates, then you can see all rates listed. |
|
To exit the screen without adding a location code to your request or report, click Cancel. |