Distributions spread costs among different jobs and/or org9s (departments). Your administrator’s settings for the expense form determine whether you can distribute expenses to a job number, an org9, or both.
You do not have to create a distribution at all levels, but you must follow this order when you create distributions: cell, then date, then category, then report.
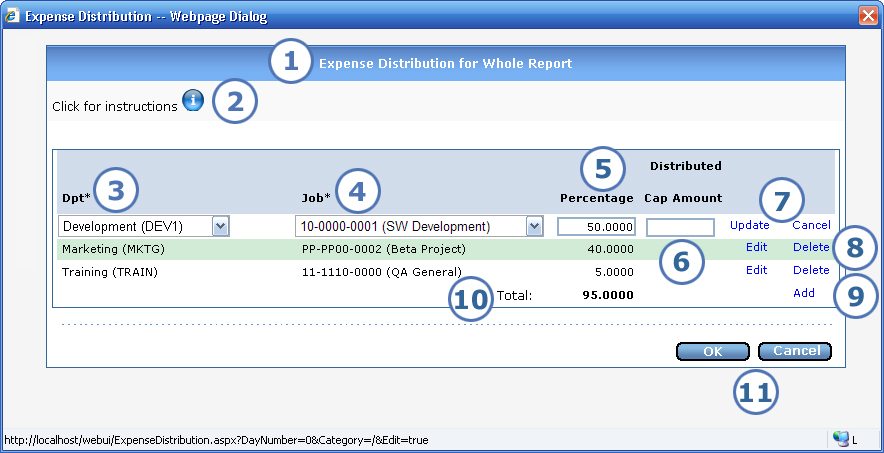
When you click Expense Distribution for the entire report or ![]() for the appropriate category, date, or cell, the Expense Distribution screen shown below appears.
for the appropriate category, date, or cell, the Expense Distribution screen shown below appears.
|
This item... |
Is for this purpose... |
|
This tells you either that you are distributing for the entire report, as shown in this image, or it tells you the category, date, or category/date (cell) that you are distributing for. |
|
To view on-screen instructions for distributing expenses, you can either click the |
|
If this field appears, select an org9 from the dropdown list, or select Search to look it up. If the screen also displays an editable job, then it may default from the org9, in which case you can change the job if you wish. |
|
If this field appears, do one of the following to enter a job.
|
|
You can enter a percentage for the distribution. By default, e-xpense applies the first distribution line to 100 percent of the total, but you can enter a different percent or an amount. See 6 for an example of how percent and amount entries interact.
|
|
You can enter an amount to deduct from the total that you are distributing. Here is an example of how different percentage and amount entries interact: Let's say that your expense report totals $1000. You distribute $400 to job ABC and then 100% to job XYZ. e-xpense deducts $400 for ABC, leaving $600 for XYZ. |
|
These two options appear to the right of the active distribution line.
|
|
These two options appear to the right of any non-active distribution line.
|
|
Click here any time that you need to enter a new distribution line. e-xpense adds a new blank line to the bottom. |
|
As you enter distribution data, e-xpense automatically calculates and displays the total of your percent entries. Prior to this version, the calculation was not automatic; you had to click a Calculate button. |
|
Click OK to save your distribution data and return to either the Edit Expense Report or Expense Detail screen. To exit the screen without saving any entries that you made since opening it, click Cancel. |