To enter more details for any expense item on the Edit Expense Report screen, click ![]() to the right of the cell. The Expense Detail screen shown below appears.
to the right of the cell. The Expense Detail screen shown below appears.
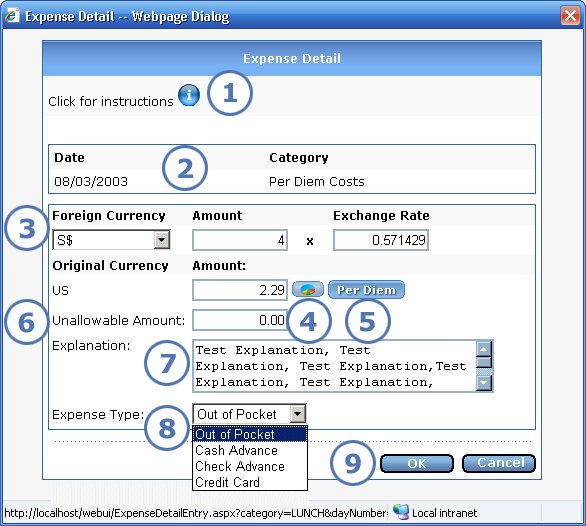
This topic describes only the most common fields. Other fields that your administrator may select to appear for the category's cells include a non-monetary quantity and the number of attendees.
|
This item... |
Is for this purpose... |
|
To view on-screen instructions for entering expense details, you can either click the |
|
This shows you the date and category of the cell for which you are entering additional information. |
|
If the expense is in a different currency from the rest of the report, then you can enter foreign currency information here:
|
|
|
Click here to enter an expense distribution for the cell. The button changes to green with a dollar sign ($) when you enter at least one distribution for the cell. |
|
If your administrator's settings allow the Per Diem button to appear, you can click it to check the current, approved rates from a government web site. These rates do not default, so you have to enter them manually. |
|
If you already entered an amount for this cell on the Edit Expense Report screen, and if you charged over the per diem rate for the cell or if the category is automatically considered unallowable, then the appropriate amount appears in the Unallowable Amount field. You can change the unallowable amount if necessary or enter a new amount if it is not already filled in. The unallowable amount cannot be greater than the amount that you entered for the cell on the Edit Expense Report screen. |
|
You can enter an additional explanation for the expense. |
|
The Expense Type field defaults to Out of Pocket. If you paid for this expense item by another method, select one of the following options from the dropdown list.
|
|
Click OK to save your expense details and return to the Edit Expense Report screen. To exit the screen without saving any entries that you made since opening it, click Cancel. |