Itinerary entry is a new feature in e-xpense.
Your administrator’s settings determine whether itinerary entry is available, and if so whether it is optional or required in order to submit a travel request. If it is allowed, then you can see an Itinerary button on the Edit Pre-Authorization Request screen. If it is required, then you will have to enter, at minimum, two lines of travel reservations and one line of hotel information.
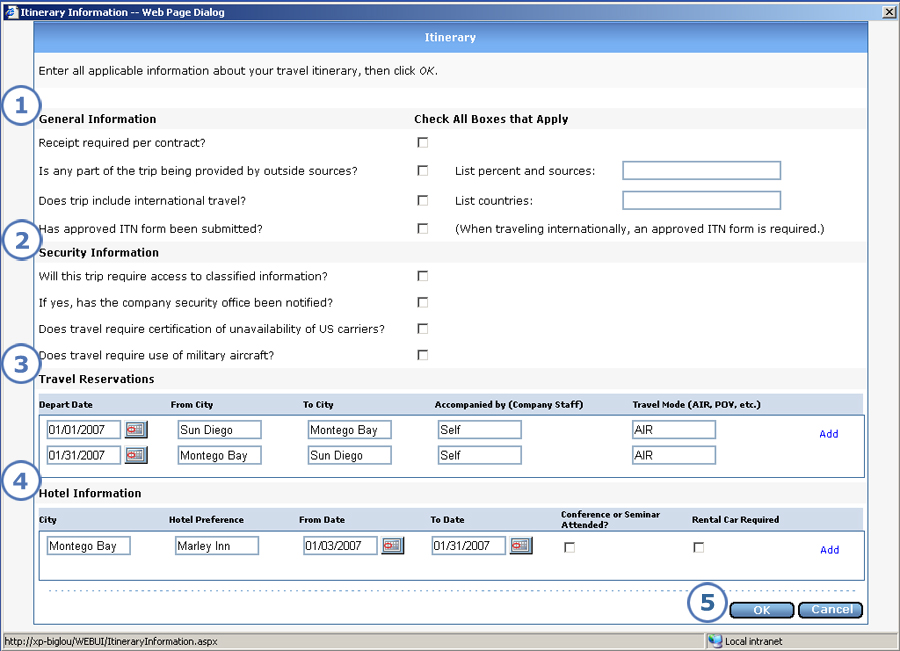
Below is an image of the Itinerary Information screen, where you enter more detailed data about your travel plans.
|
This item... |
Is for this purpose... |
|
You can provide the following data. All check boxes are blank by default. Your administrator's settings determine which questions appear in this section as well as the text of the questions.
|
|
You can provide the following data. All check boxes are blank by default. Your administrator's settings determine which questions appear in this section as well as the text of the questions.
|
|
In this section, enter the following information about your travel plans.
By default, two blank travel lines appear. If you are traveling to more than two cities, click Add before you enter information for each of lines three and up. If you want to delete any of lines three and up, click Delete to the right of the lines; this removes the bottom line, and you can repeat as needed. You cannot delete lines one and two in their entirety, but you can delete data cell-by-cell. |
|
In this section, enter the following data about your lodging and rental car needs.
By default, one blank hotel line appears. If your travel plans include more than one city where you will be staying overnight, click Add before you enter information for each of lines two and up. If you want to delete any of lines two and up, click Delete to the right of the lines; this removes the bottom line, and you can repeat as needed. You cannot delete line one in its entirety, but you can delete data cell-by-cell. |
|
Click OK to save your itinerary data and return to the Edit Pre-Authorization Request screen. To exit the screen without saving any entries that you made since opening it, click Cancel. |